
📗 설치 우분투 버전
$ lsb_release -a
No LSB modules are available.
Distributor ID: Ubuntu
Description:    Ubuntu 20.04.4 LTS
Release:        20.04
Codename:       focal
📗 설치 명령어 순서(마스터/노드)
sudo apt-get update📗 필요한 패키지 설치(마스터/노드)
sudo apt-get install \
    ca-certificates \
    curl \
    gnupg \
    lsb-release
📗 도커 GPG key 추가(마스터/노드)
curl -fsSL https://download.docker.com/linux/ubuntu/gpg | sudo gpg --dearmor -o /usr/share/keyrings/docker-archive-keyring.gpg도커 레파지토리 등록 전 수행해야 하며 gpg key를 설치하지 않으면 아래 와 같이 에러가 발생한다.
W: GPG error: https://download.docker.com/linux/ubuntu focal InRelease: The following signatures couldn't be verified because the public key is not available: NO_PUBKEY 7EA0A9C3F273FCD8
E: The repository 'https://download.docker.com/linux/ubuntu focal InRelease' is not signed.
N: Updating from such a repository can't be done securely, and is therefore disabled by default.
N: See apt-secure(8) manpage for repository creation and user configuration details.
📗 도커 레파지토리 등록(마스터/노드)
echo \
  "deb [arch=$(dpkg --print-architecture) signed-by=/usr/share/keyrings/docker-archive-keyring.gpg] https://download.docker.com/linux/ubuntu \
  $(lsb_release -cs) stable" | sudo tee /etc/apt/sources.list.d/docker.list > /dev/null
📗 도커엔진 설치(마스터/노드)
sudo apt-get update
sudo apt-get install docker-ce docker-ce-cli containerd.io
📗 도커 설치 확인(마스터/노드)
[TEST][09:47:53][magnuxx@magnuxx-virtual-machine ~]
$ sudo docker version
Client: Docker Engine - Community
 Version:           20.10.14
 API version:       1.41
 Go version:        go1.16.15
 Git commit:        a224086
 Built:             Thu Mar 24 01:48:02 2022
 OS/Arch:           linux/amd64
 Context:           default
 Experimental:      true

Server: Docker Engine - Community
 Engine:
  Version:          20.10.14
  API version:      1.41 (minimum version 1.12)
  Go version:       go1.16.15
  Git commit:       87a90dc
  Built:            Thu Mar 24 01:45:53 2022
  OS/Arch:          linux/amd64
  Experimental:     false
 containerd:
  Version:          1.5.11
  GitCommit:        3df54a852345ae127d1fa3092b95168e4a88e2f8
 runc:
  Version:          1.0.3
  GitCommit:        v1.0.3-0-gf46b6ba
 docker-init:
  Version:          0.19.0
  GitCommit:        de40ad0
📗 도커 구동 확인(마스터/노드)
sudo systemctl status docker
root@m-k8s:/etc/apt/trusted.gpg.d# sudo systemctl status docker
[0m docker.service - Docker Application Container Engine
     Loaded: loaded (/lib/systemd/system/docker.service; enabled; vendor preset: enabled)
     Active: active (running) since Thu 2022-04-07 00:25:39 UTC; 1min 47s ago
TriggeredBy: [0m docker.socket
       Docs: https://docs.docker.com
   Main PID: 19022 (dockerd)
      Tasks: 8
     Memory: 28.5M
     CGroup: /system.slice/docker.service
             붴19022 /usr/bin/dockerd -H fd:// --containerd=/run/containerd/containerd.sock
📗 시스템재시작이 되더라도 도커 실행설정(마스터/노드)
sudo systemctl enable docker
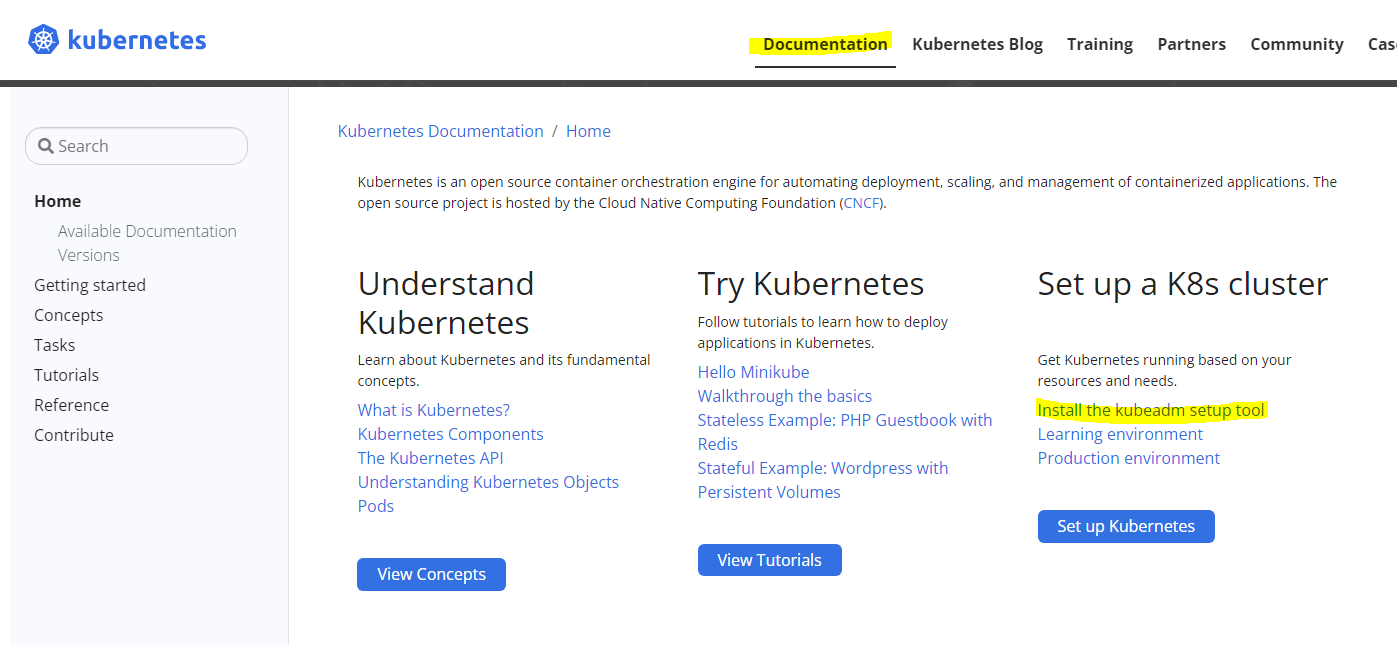
도커가 설치 되었으면 쿠버네티스 설치한다. 메뉴얼은 아래 노란표시 된 곳을 순서대로 클릭한다.
https://kubernetes.io/docs/home/
메뉴얼 첫장에보면 쿠버네티스 설치전에 swap메모리를 disable 시켜줘야한다.

📗 swap disable 방법(마스터/노드)
아래 명령어를 수행하기 전 fstab파일을 수정해야해서 root 권한상승을 시켜줘야 한다.
아래 명령어는 swap을 disable 시켜줬을 뿐만아니라 영구적 비활성화 설정이다.
swapoff -a && sed -i '/swap/s/^/#/' /etc/fstab
우분투 설치후 root 초기패스워드를 설정 후 로그인해야한다. root 초기패스워드 설정 방법은 아래와 같다.
📗 우분투 root 초기패스워드 설정
sudo passwd
📗 노드간 통신을 위한 브릿지 설정(마스터/노드)
cat <<EOF | sudo tee /etc/modules-load.d/k8s.conf
br_netfilter
EOF

cat <<EOF | sudo tee /etc/sysctl.d/k8s.conf
net.bridge.bridge-nf-call-ip6tables = 1
net.bridge.bridge-nf-call-iptables = 1
EOF
sysctl --system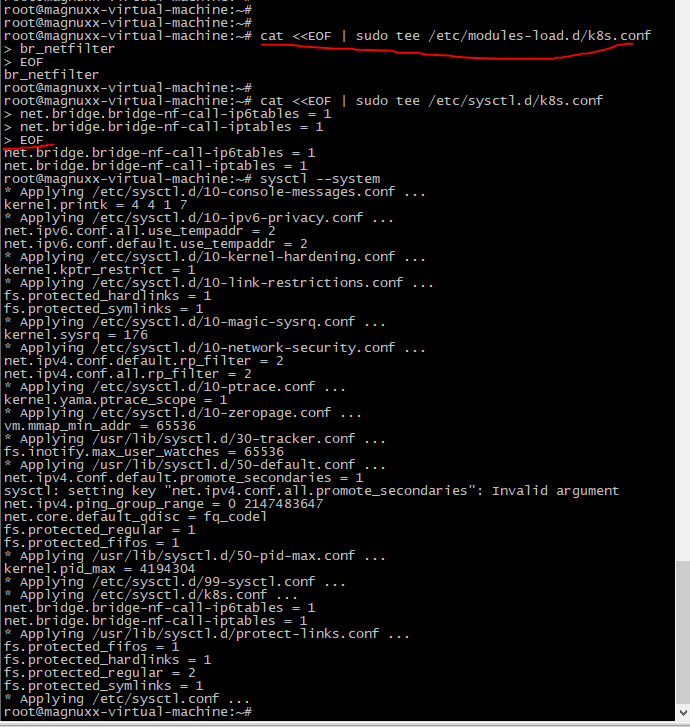
📗 kubeadm, kubelet and kubectl 설치 및 활성화(마스터/노드)
sudo apt-get update
sudo apt-get install -y apt-transport-https ca-certificates curl
sudo curl -fsSLo /usr/share/keyrings/kubernetes-archive-keyring.gpg https://packages.cloud.google.com/apt/doc/apt-key.gpg

echo "deb [signed-by=/usr/share/keyrings/kubernetes-archive-keyring.gpg] https://apt.kubernetes.io/ kubernetes-xenial main" | sudo tee /etc/apt/sources.list.d/kubernetes.list
sudo apt-get update
sudo apt-get install -y kubelet kubeadm kubectl
sudo apt-mark hold kubelet kubeadm kubectl


systemctl start kubelet && systemctl enable kubelet
Kubernetes 1.22버전부터는 systemd와 cgroup 맞춰 줘야함, 마스터/노드서버 모두 아래 명령어 수행
sudo mkdir /etc/docker
cat <<EOF | sudo tee /etc/docker/daemon.json
{
  "exec-opts": ["native.cgroupdriver=systemd"],
  "log-driver": "json-file",
  "log-opts": {
    "max-size": "100m"
  },
  "storage-driver": "overlay2"
}
EOF


sudo systemctl enable docker
sudo systemctl daemon-reload
sudo systemctl restart docker
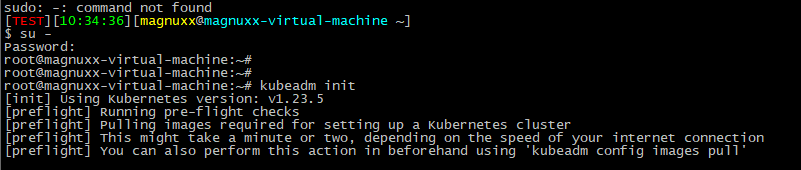
📗 마스터 노드에서 kubeadm init(마스터)
처음 설치하는 거면 reset은 생략 첫번째 주소는 마스터서버 ip 두번째 서브넷은 내부통신할 대역기재
sudo kubeadm reset
sudo kubeadm init --apiserver-advertise-address 192.168.1.10 --pod-network-cidr=192.168.1.0/24
맨아래 토큰값을 저장해놓는다.
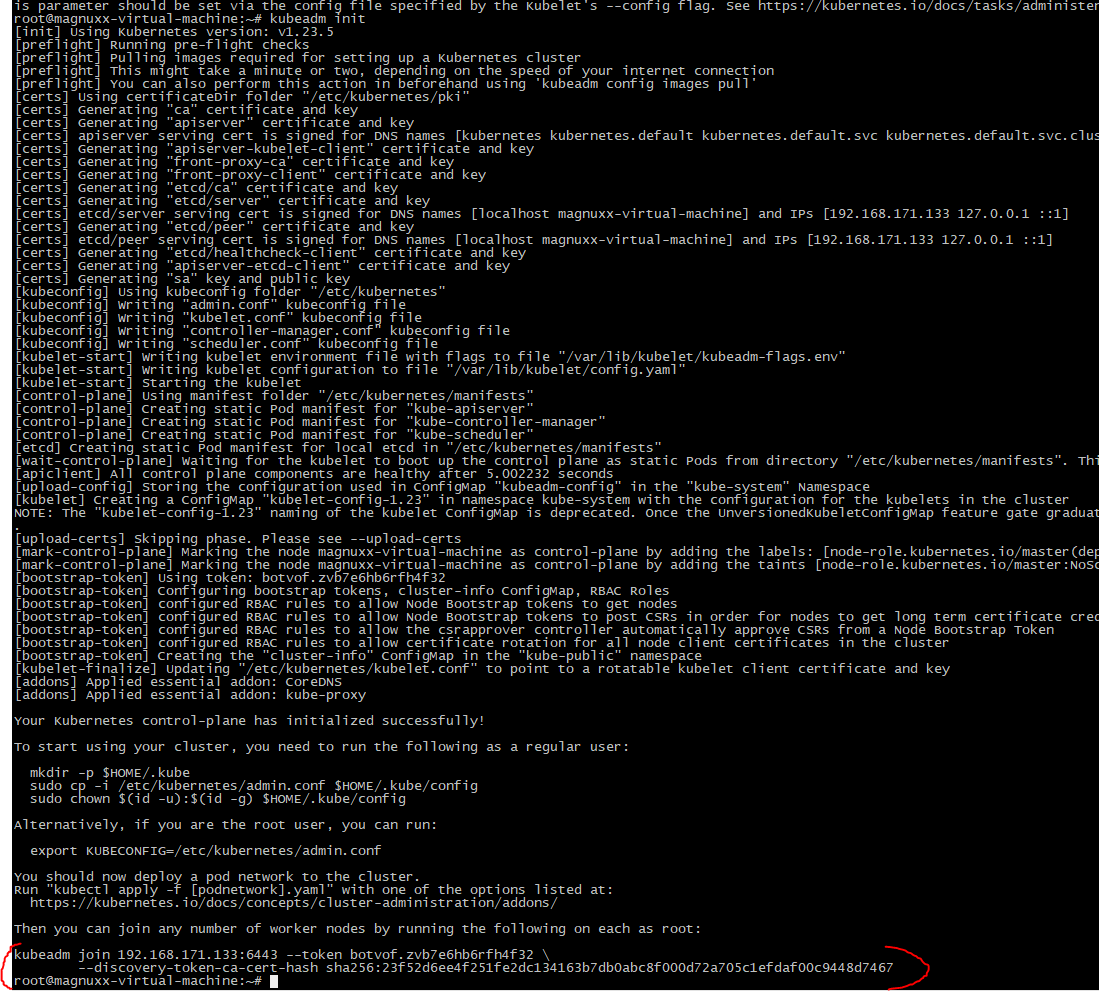
마스터에게 아래 명령어 수행한다. 해당명령어를 수행해야 kubectl 명령어를 수행할 수 있다.
  mkdir -p $HOME/.kube
  sudo cp -i /etc/kubernetes/admin.conf $HOME/.kube/config
  sudo chown $(id -u):$(id -g) $HOME/.kube/config
위 작업을 수행후 kubectl get nodes 명령어를 쳤을때 결과가 나오면 잘 된 것이다.

📗 kubeadm 초기화 방법(마스터 노드에서만 수행)
워크노드가 붙을 마스터노드 아이피와 파드의 내부네트워크 지정방법
sudo kubeadm reset
sudo kubeadm init --apiserver-advertise-address 192.168.1.10 --pod-network-cidr=192.168.1.0/24

kubectl apply -f https://raw.githubusercontent.com/coreos/flannel/master/Documentation/kube-flannel.yml
📗 pod network add-on(마스터 노드에서만 수행)
kubectl apply -f "https://cloud.weave.works/k8s/net?k8s-version=$(kubectl version | base64 | tr -d '\n')"
worker node 조인
에러
root@magnuxx-virtual-machine:~# kubeadm join 192.168.171.133:6443 --token botvof.zvb7e6hb6rfh4f32 \
>         --discovery-token-ca-cert-hash sha256:23f52d6ee4f251fe2dc134163b7db0abc8f000d72a705c1efdaf00c9448d7467
[preflight] Running pre-flight checks
error execution phase preflight: [preflight] Some fatal errors occurred:
        [ERROR FileAvailable--etc-kubernetes-pki-ca.crt]: /etc/kubernetes/pki/ca.crt already exists
[preflight] If you know what you are doing, you can make a check non-fatal with `--ignore-preflight-errors=...`
To see the stack trace of this error execute with --v=5 or higher
root@magnuxx-virtual-machine:~# kubectl -n kube-system get cm kubeadm-config -o yaml
The connection to the server localhost:8080 was refused - did you specify the right host or port?
root@magnuxx-virtual-machine:~#
📗 쿠버네티스 인증서 에러
Unable to connect to the server: x509: certificate is valid for 10.96.0.1, 192.168.1.10, not 10.0.2.15
처리방법 : 아래 명령어 수행
export KUBECONFIG=/etc/kubernetes/admin.conf📗 쿠버네티스 노드 조인 실패(kube node join)
root@w2-k8s:~# kubeadm join 192.168.1.10:6443 --token rvnntw.vecv4k0h0ejoq1rq --discovery-token-ca-cert-hash sha256:60efab4da8845b710952d6379c1f8d4b06d02e567b03e2bd3845746dab3d64e8
[preflight] Running pre-flight checks
[preflight] Reading configuration from the cluster...
[preflight] FYI: You can look at this config file with 'kubectl -n kube-system get cm kubeadm-config -o yaml'
W0407 02:23:02.671663   36351 utils.go:69] The recommended value for "resolvConf" in "KubeletConfiguration" is: /run/systemd/resolve/resolv.conf; the provided value is: /run/systemd/resolve/resolv.conf
[kubelet-start] Writing kubelet configuration to file "/var/lib/kubelet/config.yaml"
[kubelet-start] Writing kubelet environment file with flags to file "/var/lib/kubelet/kubeadm-flags.env"
[kubelet-start] Starting the kubelet
[kubelet-start] Waiting for the kubelet to perform the TLS Bootstrap...
[kubelet-check] Initial timeout of 40s passed.
[kubelet-check] It seems like the kubelet isn't running or healthy.
[kubelet-check] The HTTP call equal to 'curl -sSL http://localhost:10248/healthz' failed with error: Get "http://localhost:10248/healthz": dial tcp 127.0.0.1:10248: connect: connection refused.
[kubelet-check] It seems like the kubelet isn't running or healthy.
[kubelet-check] The HTTP call equal to 'curl -sSL http://localhost:10248/healthz' failed with error: Get "http://localhost:10248/healthz": dial tcp 127.0.0.1:10248: connect: connection refused.
마스터 뿐만아니라 노드에도 systemd와 cgroup 맞춰 줘야함, 마스터/노드서버 모두 아래 명령어 수행해야함
sudo mkdir /etc/docker
cat <<EOF | sudo tee /etc/docker/daemon.json
{
  "exec-opts": ["native.cgroupdriver=systemd"],
  "log-driver": "json-file",
  "log-opts": {
    "max-size": "100m"
  },
  "storage-driver": "overlay2"
}
EOF


sudo systemctl enable docker
sudo systemctl daemon-reload
sudo systemctl restart docker
📗 kube 워크노드 조인 status notready 문제해결방법
노드 조인을 했으나 마스터노드에서 상태확인시 조인시킨 워크노드의 상태가 Not ready로 유지되는 문제
root@m-k8s:/etc/apt/trusted.gpg.d# kubectl get nodes
NAME     STATUS     ROLES                  AGE     VERSION
m-k8s    Ready      control-plane,master   3h19m   v1.23.5
w1-k8s   Ready      <none>                 3h15m   v1.23.5
w2-k8s   NotReady   <none>                 159m    v1.23.5

워크 노드에서도 systemctl status kubelet로 확인시 Process쪽이 이상함
systemctl restart kubelet해도 상태가 나아지지 않음
root@w2-k8s:~# systemctl status kubelet
kubelet.service - kubelet: The Kubernetes Node Agent
     Loaded: loaded (/lib/systemd/system/kubelet.service; enabled; vendor preset: enabled)
    Drop-In: /etc/systemd/system/kubelet.service.d
             붴10-kubeadm.conf
     Active: activating (auto-restart) (Result: exit-code) since Thu 2022-04-07 05:07:36 UTC; 7s ago
       Docs: https://kubernetes.io/docs/home/
    Process: 66672 ExecStart=/usr/bin/kubelet $KUBELET_KUBECONFIG_ARGS $KUBELET_CONFIG_ARGS $KUBELET_KUBEADM_ARGS $KUBELET_EXTRA_ARGS (code=exited, status=1/FAILURE)
   Main PID: 66672 (code=exited, status=1/FAILURE)
해결방법
보통 바로 Ready로 변하지않고 최대 2~3분 후 변함 그래도 안변하면
마스터노드에서 받은 조인 명령어다시 수행
(아래는 예시입니다. 마스터노드에 생성된 값으로 다시한번 수행하면 됨)
kubeadm join 192.168.1.10:6443 --token rvnntw.vecv4k0h0ejoq1rq --discovery-token-ca-cert-hash sha256:60efab4da8845b710952d6379c1f8d4b06d02e567b03e2bd3845746dab3d64e8📗 localhost8080 was refuesed
증상
root@masternode:~# kubectl get nodes
The connection to the server localhost:8080 was refused - did you specify the right host or port?
처리방법
  mkdir -p $HOME/.kube
  sudo cp -i /etc/kubernetes/admin.conf $HOME/.kube/config
sudo chown $(id -u):$(id -g) $HOME/.kube/config'인프라 > Docker&K8S' 카테고리의 다른 글
| 쿠버네티스 명령어 훓어보기(k8s명령어) (0) | 2022.04.08 |
|---|---|
| vagrant 로 vm 생성하기 vagrant명령어 (0) | 2022.04.07 |
| teleport /lib64/libc.so.6: version `GLIBC_2.18' not found (0) | 2022.03.06 |
| 우분투 도커설치 하기(ubuntu docker 설치) (0) | 2022.03.06 |
| 텔레포트(telelport) 도커 컨테이너 설치에러 (0) | 2022.03.05 |


댓글